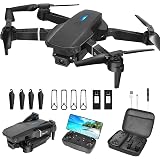
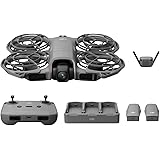
Building your own quadcopter at home is a rewarding project that combines electronics, mechanics, and programming into one exciting package. While the video above provides a fantastic visual guide to the assembly process, delving into the specifics of each component and step is crucial for a successful build. This guide will expand on the visual demonstration, offering detailed insights into how to make a drone that flies impeccably and meets your specific needs.
Creating a custom drone offers numerous benefits beyond simply owning a flying machine. It allows for deep customization, enabling you to tailor performance, payload capacity, and flight characteristics precisely. Furthermore, the process of building a quadcopter provides an invaluable learning experience, demystifying the technology behind these fascinating devices. This hands-on approach builds confidence and a practical understanding of electronics and aerodynamics.
Essential Components for Your DIY Quadcopter Build
Every successful quadcopter build begins with selecting the right components. Understanding the function of each part is key to assembling a reliable and high-performing custom drone. Here’s a breakdown of the core elements you’ll need:
The Quadcopter Frame: The Skeleton of Your Drone
The frame is the structural backbone of your quadcopter, dictating its size, rigidity, and the placement of other components. Frames come in various materials, including carbon fiber, plastic, and aluminum. Carbon fiber frames are popular for their excellent strength-to-weight ratio, making them ideal for performance builds. Consider the size of your motors and propellers when choosing a frame, ensuring ample clearance.
Motors: The Power Behind Flight
Quadcopter motors are brushless DC motors, chosen for their efficiency and power. They are typically specified by their size and Kv rating. The Kv rating indicates the RPM per volt, directly influencing the propeller size and battery voltage suitability. Selecting motors that match your frame size and intended flight characteristics is vital for optimal performance and flight stability.
Electronic Speed Controllers (ESCs): Motor Management
ESCs are critical components that translate signals from the flight controller into appropriate power levels for each motor. Each motor requires its own ESC. These units manage motor speed and direction, ensuring smooth and responsive control during flight. Modern ESCs often feature advanced protocols for faster communication with the flight controller, improving overall responsiveness and efficiency.
Flight Controller: The Brain of Your Drone
The flight controller is perhaps the most sophisticated part of your custom drone. It processes inputs from the remote control, internal sensors (like accelerometers and gyroscopes), and other modules to maintain stable flight. Popular flight controllers often run open-source firmware like Betaflight, Ardupilot, or iNav, allowing for extensive customization and tuning. Its ability to interpret commands and execute flight adjustments precisely is paramount.
Receiver and Transmitter: Your Command Center
To pilot your quadcopter, you need a radio transmitter (often called a remote control) and a corresponding receiver mounted on the drone. The transmitter sends control signals, which the receiver captures and relays to the flight controller. Various radio protocols exist, each with different ranges, latency, and security features. Ensure compatibility between your chosen transmitter and receiver for seamless control.
Battery: Fueling Your Flight
Lithium Polymer (LiPo) batteries are the standard power source for quadcopters due to their high energy density. Battery specifications include voltage (indicated by “S” for series cells, e.g., 3S, 4S) and capacity (measured in mAh). The “C” rating indicates the discharge rate, which is crucial for delivering sufficient power to your motors. Always prioritize safety when handling LiPo batteries, as they require careful charging and storage practices.
Propellers: Generating Thrust
Propellers are responsible for generating the lift that allows your quadcopter to fly. They come in various sizes and pitches, directly impacting thrust and efficiency. The number of blades and their shape also play a role in flight characteristics, from aggressive racing to stable aerial photography. Choosing the correct propeller size and pitch depends on your motor Kv, battery voltage, and desired flight profile.
Tools for Your Quadcopter Assembly
Before you begin the exciting task of building your drone, gather the necessary tools. A good set of precision screwdrivers, a soldering iron with fine tips, wire strippers, and heat shrink tubing are essential. Additionally, a multimeter can be incredibly useful for checking continuity and voltage during the wiring process. Having the right tools makes the assembly smoother and more precise.
Assembling Your Custom Quadcopter: A Step-by-Step Guide
The video demonstrates the physical assembly of a quadcopter, and understanding the order and purpose of each step is crucial. This process often involves meticulous soldering and careful component placement to ensure proper functionality and durability for your DIY drone.
Frame Assembly and Motor Mounting
Start by assembling the quadcopter frame according to its instructions. This usually involves attaching the arms to the main body plate. Next, securely mount your brushless motors to the frame’s arms. Pay attention to the direction each motor needs to spin; typically, two motors spin clockwise (CW) and two counter-clockwise (CCW). Incorrect motor orientation will prevent stable flight.
ESC Installation and Wiring
Mount the ESCs onto the frame, often near their respective motors. Solder the three motor wires from each ESC to its corresponding motor. The order of these three wires determines the motor’s spin direction. If a motor spins the wrong way during initial testing, simply swap any two of these wires. Then, connect the power leads (red and black) from each ESC to the power distribution board (PDB) or directly to the flight controller if it has integrated power distribution.
Flight Controller Installation and Connections
Mount the flight controller to the center of your frame, ensuring it is properly oriented according to its documentation. Typically, an arrow on the board indicates the front. Connect the signal wires from each ESC to the appropriate motor outputs on the flight controller. These are usually labeled M1, M2, M3, M4. Also, connect the receiver to the flight controller using the specified protocol (e.g., SBUS, PPM, Crossfire). This step is crucial for the quadcopter’s control.
Power Distribution and Battery Connections
If using a separate PDB, all ESC power leads connect to it, and the PDB then connects to the flight battery. Otherwise, connect ESCs and battery directly to the flight controller’s power pads. Solder the battery connector (e.g., XT60) to the main power pads on your PDB or flight controller. Double-check all power connections for correct polarity before connecting a battery to prevent damage. A properly wired power system ensures all components receive consistent and safe power.
Propeller Attachment and Initial Checks
Attach the propellers to their respective motors. Ensure that the CW propellers are on the CW spinning motors and CCW propellers on CCW spinning motors. The orientation of the propellers (leading edge facing the direction of rotation) is also critical for generating lift. Before connecting a battery for the first time, perform a final visual inspection of all connections and ensure no loose wires or short circuits are present. This prevents potential issues during the quadcopter’s first power-up.
Powering Up and Initial Configuration
With all components assembled, the next step is to power up your quadcopter and configure the flight controller firmware. This critical stage involves flashing the firmware, calibrating sensors, and setting up your radio. Many flight controllers use open-source software that offers extensive tuning options for your DIY drone.
Firmware Flashing and Configuration
Connect your flight controller to your computer via USB. Use the appropriate configuration software (e.g., Betaflight Configurator, Mission Planner) to flash the latest firmware. This software also allows you to configure essential settings like motor layout, ESC protocol, and receiver type. Spend time understanding these settings, as they directly impact flight performance. Calibrate the accelerometer and gyroscope to ensure the drone knows its orientation.
Motor and Radio Calibration
Calibrate your ESCs to ensure they respond correctly to the flight controller’s signals. This often involves a specific sequence of throttle movements with your remote control. Next, calibrate your radio transmitter and receiver. Ensure all stick movements (roll, pitch, yaw, throttle) are correctly mapped and moving in the right direction within the flight controller software. Set up arming switches and flight modes for safe and flexible operation.
Safety First: Important Considerations for Drone Operation
Operating a custom drone requires a strong emphasis on safety. Improper handling or flight can lead to injury or damage. Always remove propellers during initial setup and testing to prevent accidental injury. Ensure your battery is fully charged and securely mounted before flight. Choose a safe, open area away from people, animals, and obstacles for your first test flights. Understanding and adhering to local drone regulations is also paramount for responsible flying.
Beyond the Basics: Enhancing Your Custom Drone
After successfully building and flying your basic quadcopter, you might consider enhancements to expand its capabilities. Adding a First Person View (FPV) system with a camera and video transmitter allows for immersive flying experiences. Integrating GPS modules enables features like return-to-home and waypoint navigation. You can also experiment with different propeller types or motor configurations to fine-tune performance. Building a drone is often just the beginning of a continuous journey of learning and improvement.
Your Quadcopter Crafting Queries Answered
Why should I build my own quadcopter instead of buying one?
Building your own quadcopter allows for deep customization of its performance and features. It also provides a valuable hands-on learning experience about electronics and aerodynamics.
What is considered the ‘brain’ of a DIY quadcopter?
The flight controller is the brain, as it processes inputs from your remote control and internal sensors to maintain stable flight. It interprets commands and executes precise adjustments.
What are some of the main parts I will need to build a quadcopter?
You will need essential components such as the frame, motors, Electronic Speed Controllers (ESCs), a flight controller, a receiver and transmitter, a battery, and propellers.
What basic tools are needed to assemble a quadcopter?
Essential tools include precision screwdrivers, a soldering iron with fine tips, wire strippers, and heat shrink tubing. A multimeter can also be very helpful for checking connections.
What is the initial step when starting the physical assembly of a quadcopter?
The first step is to assemble the quadcopter frame according to its instructions and then securely mount the brushless motors to the frame’s arms, paying attention to their spin direction.