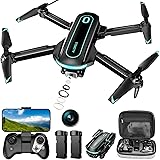
Learning to fly a drone can feel a bit like stepping into the cockpit of a miniature aircraft for the first time. The controls might seem daunting, and the thought of sending your brand-new device skyward can be intimidating. I remember my own early days with a drone, specifically a Phantom 2, when overconfidence led to an unplanned encounter with a palm tree almost immediately after takeoff. It was a stark reminder that even with seemingly simple controls, practice and understanding are paramount. The video above offers an excellent foundational guide to understanding the basic mechanics, and this accompanying article will dive deeper, providing essential context and expanding on those crucial first steps to help you master how to fly a drone.
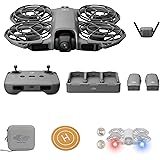
Before any flight, understanding your drone’s brain – its controller – is absolutely essential. The standard configuration, common to most drones right out of the box, provides a logical starting point. While custom configurations are possible, grasping the default setup will build a robust foundation for any beginner drone pilot.
Understanding Your Drone Controller: The Dual Joystick System
At the heart of nearly every drone controller are two joysticks, each responsible for different primary movements. Think of them as your hands guiding the drone through the air, meticulously controlling its position and orientation. Mastering these two inputs is the key to smooth, confident drone flight.
The Left Joystick: Altitude and Rotation (Yaw)
The left joystick is often considered the drone’s anchor, controlling its vertical position and its rotation around a central axis. This stick primarily dictates whether your drone ascends, descends, or spins in place, making it fundamental for maintaining a stable hover or executing controlled rotations for cinematic shots.
- Up/Down (Throttle): Pushing the left joystick up increases the drone’s throttle, causing it to ascend into the sky. Conversely, pulling it down decreases throttle, initiating a controlled descent. Learning to feather this control for smooth, consistent altitude changes is a critical skill for any aspiring drone pilot.
- Left/Right (Yaw): Moving the left joystick left or right causes the drone to rotate horizontally on its own axis, much like a helicopter pivoting in place. This movement, known as yaw, is crucial for changing the drone’s heading or framing a shot without altering its position in space. Imagine the drone spinning to face a different direction while remaining over the same spot on the ground.
The left joystick effectively keeps your drone grounded in one spot, managing its height and its orientation. It’s the primary tool for maintaining a steady hover and for framing the initial shot, ensuring the drone is perfectly positioned before any forward motion begins.
The Right Joystick: Directional Movement (Pitch and Roll)
Once you’ve mastered the left joystick, the right joystick introduces the drone’s ability to translate through space – to move forward, backward, or side-to-side. This stick directly influences the drone’s pitch and roll, enabling it to travel from one point to another while maintaining its heading or even strafing alongside a subject.
- Up/Down (Pitch): Pushing the right joystick forward causes the drone to tilt its nose down (pitch forward) and move in that direction. Pulling it backward causes the drone to tilt its nose up (pitch backward) and move in reverse. This is your primary control for linear movement.
- Left/Right (Roll/Strafe): Moving the right joystick left or right causes the drone to tilt sideways (roll) and move horizontally in that direction, commonly referred to as “strafing.” This is incredibly useful for smooth tracking shots, moving parallel to a subject without changing the drone’s forward-facing camera direction.
A combination of both joysticks is essential for fluid, dynamic drone flight. For instance, to fly forward and simultaneously rotate for a panning shot, you would engage both joysticks in concert. Developing this coordination will elevate your drone piloting skills, allowing for more complex and visually appealing maneuvers.
Beyond Basic Flight: Essential Drone Controller Functions
Modern drone controllers offer more than just two joysticks. They come equipped with a suite of buttons and wheels designed to enhance your flying experience, offer greater control over your footage, and ensure operational safety. Understanding these additional features is crucial for any beginner drone pilot looking to get the most out of their equipment.
Gimbal Control: Shaping Your View
One of the most significant advancements in drone technology for aerial photography and videography is the gimbal. This stabilized mount holds your camera, allowing it to move independently of the drone’s body, ensuring smooth, level footage even as the drone pitches and rolls. On most DJI drones, and many others, you’ll find a jog wheel, typically on the upper left-hand side of the controller, dedicated to gimbal control.
This wheel usually allows you to tilt the camera up and down, offering a range from looking straight ahead to pointing directly down (a 90-degree tilt). Newer drone models often allow for even greater upward tilt, enabling shots from a low perspective looking up. The speed at which the gimbal moves can usually be adjusted in the drone’s software settings. Setting the gimbal speed slower often results in more cinematic, graceful camera movements, although a faster setting can be useful for quick adjustments or for general observational flying.
Speed Modes: Tailoring Your Flight Experience
Many controllers, particularly those from DJI, feature a speed switch or button, usually in the middle of the controller. This allows you to toggle between different flight modes that dictate the drone’s responsiveness and maximum speed. Common modes include:
- Cine (or Tripod) Mode: This mode significantly reduces the drone’s speed and responsiveness, making movements incredibly smooth and deliberate. It’s ideal for capturing cinematic footage where precision and slow, flowing motions are key.
- Normal Mode: A balanced mode offering a good mix of speed and control, suitable for general flying and learning.
- Sport (or Fast) Mode: This mode unlocks the drone’s full speed and agility, making it highly responsive. While exciting, it demands greater piloting skill and should be used with extreme caution, especially when learning how to fly a drone.
Starting in Cine or Normal mode is highly recommended for beginners to build confidence and muscle memory without the added challenge of high speeds.
Return-to-Home (RTH) Button: Your Safety Net
The Return-to-Home (RTH) button is a critical safety feature found on most modern drones. Pressing this button commands the drone to automatically return to its last recorded home point – typically the GPS coordinates where it took off. This feature is invaluable for situations where you lose sight of your drone, lose connection, or simply want it to come back automatically.
However, RTH isn’t a “set it and forget it” solution. You must configure the RTH altitude in your drone’s app. This setting determines how high the drone will ascend before flying back. In areas with tall trees, buildings, or other obstacles, setting an appropriate RTH altitude (higher than the tallest obstacle) is crucial to prevent collisions. Always adjust this setting based on your current flying environment before every flight. While generally reliable, there are situations, such as flying over a moving boat or car, where manually flying the drone back home is safer than relying on RTH, as the home point might no longer be relevant.
Function Buttons: Customizable Controls
Many drone controllers include one or more customizable function (Fn) buttons. These buttons can be programmed within the drone’s app to perform various actions with a single press. Popular uses include:
- Gimbal Snap: Quickly snapping the gimbal to a straight-ahead (0-degree) or straight-down (90-degree) position. This is incredibly useful for quickly re-orienting your camera for navigation or specific shots.
- Center Gimbal: Automatically bringing the gimbal back to its default, forward-facing position.
- Camera Settings: Quickly toggling between photo and video modes, or adjusting exposure settings.
- Obstacle Avoidance Toggle: Turning obstacle sensors on or off (use with extreme caution).
Experiment with these function button settings to find what enhances your drone piloting workflow most effectively.
Cultivating Spatial Awareness: The Practice Imperative
The speaker in the video rightly stresses the importance of practice, sharing a personal anecdote about a crash on a Phantom 2 due to insufficient open-field training. This advice cannot be overstated. Learning how to fly a drone effectively is less about memorizing button presses and more about developing an intuitive understanding of how your drone moves in three-dimensional space.
Start in an Open Field
Take your drone to a large, unobstructed open field – ideally a designated drone flying area or private property with permission. Avoid areas with trees, power lines, buildings, or large crowds. This removes the immediate pressure of obstacles and allows you to focus solely on control input and drone response.
Basic Flight Drills for Beginners
Dedicate time to these fundamental exercises to build muscle memory and confidence:
- The Hover: Practice taking off and holding a stable hover for extended periods. Focus on using the left joystick minimally to maintain altitude and a fixed position. This builds a foundational understanding of micro-adjustments.
- Figure Eights: Once hovering is comfortable, practice flying in smooth figure-eight patterns. This requires coordinating both joysticks – pitching forward with the right, then yawing and rolling through the turn with both.
- Square Patterns: Fly the drone in a perfect square, pausing at each corner. This helps develop precision in strafing and forward/backward movements.
- Orbital Shots: While more advanced, practicing a slow orbit around an imaginary central point is an excellent way to coordinate yaw, pitch, and roll for smooth circular motion, crucial for cinematic drone footage.
- Nose-In/Nose-Out Practice: Practice flying with the drone’s “nose” (front) facing away from you, then towards you. This helps you adapt to inverted controls, a common challenge for new pilots.
Monitor Your Surroundings and Screen
One of the biggest challenges for new drone pilots is accurately judging distances in the air. What appears far away on your controller’s screen might be closer than you think, and vice-versa. Always maintain visual line of sight (VLOS) with your drone. Use your screen for framing shots and monitoring telemetry (battery, altitude, speed), but rely on your eyes for spatial awareness and obstacle avoidance. Regularly glance up from your screen to physically locate your drone.
Pre-Flight Checklist: Before Every Flight
Beyond learning the controls, developing a rigorous pre-flight checklist is non-negotiable for safe drone flight. This ensures your equipment is ready and your environment is suitable. While not extensively covered in the video, these steps are vital for anyone learning how to fly a drone:
- Battery Check: Ensure drone and controller batteries are fully charged.
- Propeller Inspection: Check propellers for any cracks, chips, or damage. Replace if necessary.
- Gimbal Guard: Remove the gimbal guard before powering on the drone.
- SD Card: Confirm an SD card is inserted and has sufficient free space.
- GPS Lock: Wait for the drone to acquire a strong GPS signal (usually indicated by blinking lights or app notification) and record its home point before taking off.
- RTH Altitude: Verify the Return-to-Home altitude is appropriate for your current environment.
- Weather Check: Confirm suitable weather conditions (low wind, no rain). Avoid flying in strong winds, which can quickly drain battery and make control difficult for beginners.
- Airspace Check: Use a drone safety app (like B4UFLY in the U.S.) to ensure you are flying in legal and safe airspace.
By systematically addressing these points before each flight, you significantly mitigate risks and set yourself up for successful, enjoyable drone piloting sessions.
Post-Flight Debrief: Your Q&A
How do I make my drone go up, down, or spin around?
The left joystick controls these movements; push it up to ascend, pull it down to descend, and move it left or right to make the drone spin (yaw) in place.
How do I move my drone forward, backward, or side-to-side?
The right joystick controls these directional movements; push it forward or backward to move linearly, and move it left or right to strafe sideways.
What is the Return-to-Home (RTH) button for?
The RTH button is a safety feature that makes your drone automatically fly back to its takeoff location. It’s important to set its return altitude in your drone’s app to avoid obstacles.
How can I change the drone’s camera view up or down?
You can change the camera’s tilt using the gimbal control wheel, usually located on the upper left side of the controller. This allows you to point the camera higher or lower.
What are the different speed modes for a drone?
Drones often have modes like Cine, Normal, and Sport. Cine mode offers slow, smooth movements for cinematic shots, while Normal is balanced, and Sport unlocks full speed for advanced pilots.