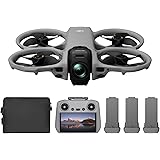
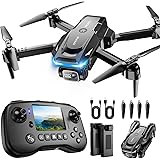
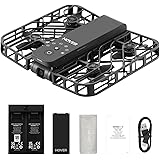
The exhilarating world of drone flying begins with a crucial first step: establishing a reliable connection between your drone and its remote controller. As visually demonstrated in the accompanying video, the process of pairing a drone with its remote controller might seem straightforward, yet it involves a sequence of specific actions that ensure seamless communication throughout your flight. Understanding this fundamental setup is paramount for both novice and experienced pilots, as it directly impacts flight safety and operational control.
This article aims to expand upon the visual guide, providing a deeper understanding of the drone pairing process, offering practical insights, and detailing common troubleshooting steps. While the video succinctly captures the physical movements, the underlying principles and potential issues are explored here, ensuring you are well-equipped to get your drone airborne safely and efficiently.
Understanding Drone Remote Pairing and Binding
At its core, drone remote pairing, often referred to as binding, is the process by which a unique identifier is established between a specific drone (the receiver) and its corresponding remote controller (the transmitter). This digital handshake ensures that your remote controller commands only your drone, preventing interference from other devices and guaranteeing precise control. Without proper binding, the drone would not respond to any input from the controller, making flight impossible.
Most modern drones and their controllers are designed for ease of use, with manufacturers streamlining the pairing sequence. However, each model can have slight variations in button presses or indicator lights. It is typically a one-time setup, though re-binding may be required after firmware updates, battery changes, or if the connection is unexpectedly lost.
The Essential Steps for Initial Drone Pairing
Following the actions observed in the video, a typical drone pairing process can be broken down into several key stages. While the exact timing and specific button labels may vary by manufacturer, the underlying sequence is generally consistent across many models:
- Powering Up the Remote Controller: The first action often involves pressing the power button on the remote controller. This initiates its internal systems and begins its search for a drone to connect with. Indicator lights or audible beeps typically confirm that the controller is active and ready.
- Powering On the Drone: Subsequently, the drone itself is powered on. This usually involves pressing its power button, at which point its internal diagnostics begin. The drone’s lights will often flash, indicating it is waiting for a connection or performing initial checks.
- Initiating the Binding Sequence: Many drones require a specific action on the remote controller to initiate the binding. This could be a combination of holding certain buttons, moving joysticks in a particular pattern (as seen in the video’s initial joystick movements), or accessing a specific menu within the remote’s display. This action tells the remote to actively search for and connect to a drone in binding mode.
- Confirmation of Connection: Once the drone and remote successfully communicate, a clear indication is typically provided. This might be a solid light on both devices, a change in the remote’s display, or a distinct sound. The whirring of the drone’s motors, as heard in the video, signifies that the drone is receiving commands and is ready to respond.
- Initial Calibration: After pairing, a crucial step for many drones is calibration. This often involves moving the joysticks through their full range of motion or performing a specific sequence of movements, such as the inward and downward joystick motion observed in the video. This calibrates the drone’s internal compass (IMU) and gyroscope, ensuring stable flight. An uncalibrated drone can drift or behave erratically during flight.
It is important that these steps are performed carefully, allowing each device ample time to power up and process commands. Patience in this initial setup phase prevents many common issues that new pilots might encounter.
Troubleshooting Common Drone Pairing Issues
Despite the streamlined nature of modern drone technology, issues with drone remote pairing can occasionally arise. When the expected connection is not established, a systematic approach to troubleshooting is often required. Many issues can be resolved with simple checks, while others may require a deeper dive into the drone’s settings or firmware.
No Connection Established
If the drone and remote controller fail to connect after following the standard procedure, consider these points:
- Power Cycle Both Devices: Often, simply turning off both the drone and the remote controller, waiting a few seconds, and then powering them back on in the correct sequence (remote first, then drone) can resolve a temporary glitch.
- Check Battery Levels: Ensure both the drone’s flight battery and the remote controller’s internal battery are sufficiently charged. Low power can prevent devices from properly communicating or entering binding mode.
- Proximity: Make sure the drone and remote are close to each other, typically within one to three feet, during the initial pairing process. Once paired, the operational range will extend significantly.
- Environmental Interference: Strong Wi-Fi signals, other radio frequency devices, or large metallic objects nearby can interfere with the pairing signal. Try moving to an open area away from potential sources of interference.
- Consult the Manual: Every drone model has a specific, detailed pairing procedure. The user manual is the definitive guide and should be referenced if standard methods fail. It may detail unique button combinations or timing specific to your model.
Unstable or Intermittent Connection
Even after a successful initial pairing, an unstable connection can manifest as laggy controls, dropped signals, or unexpected drone behavior. This can be particularly frustrating and concerning during flight.
- Antenna Position: Ensure the remote controller’s antennas are properly oriented. They should generally be pointed towards the drone for optimal signal reception.
- Firmware Mismatch: Sometimes, a firmware update on either the drone or the remote controller might create a version mismatch, leading to connectivity issues. Regularly check for and install updates for both devices, ensuring they are compatible.
- Physical Damage: Inspect the remote controller and the drone for any visible damage, especially to the antennas or connection ports. Even minor damage can affect signal integrity.
- Recalibration: An unstable connection can sometimes be an indicator that the drone’s internal sensors, such as the IMU or compass, require recalibration. Following the video’s example of moving joysticks inward and downward for calibration after a connection is established is a good practice.
Pre-Flight Essentials After Successful Pairing
Once your drone is successfully paired with its remote controller and all initial calibrations are performed, several pre-flight checks are universally recommended to ensure a safe and enjoyable flight experience. These steps are crucial, extending beyond the mere act of binding.
- Propeller Check: Confirm that all propellers are securely attached, undamaged, and correctly oriented according to the drone’s manual.
- Battery Security: Verify that the flight battery is fully charged and securely fastened within the drone. Loose batteries can shift during flight, affecting balance and potentially causing power loss.
- GPS Signal Acquisition: For drones equipped with GPS, allow sufficient time for the drone to acquire a strong GPS signal before takeoff. This enables accurate positioning, return-to-home functions, and stable hovering.
- Environment Scan: Before every flight, visually inspect your surroundings for any obstacles, power lines, or no-fly zones. Be aware of weather conditions, especially wind speed, which can significantly impact drone stability.
- Test Controls: With the drone safely on the ground and propellers clear of any obstructions, gently test the joystick movements on the remote controller to ensure the drone responds as expected before taking off. Listen for the motors whirring as you manipulate the joysticks, confirming the drone is receiving commands.
By diligently following these procedures for drone pairing and conducting thorough pre-flight checks, operators can significantly enhance the safety and reliability of their drone flights. The initial setup, though seemingly minor, forms the bedrock of every successful aerial adventure.
Ready for Takeoff: Your Drone Pairing Q&A
What does it mean to ‘pair’ or ‘bind’ a drone with its remote controller?
Pairing, also called binding, is how your drone and its remote controller establish a unique digital connection. This ensures your remote commands only your specific drone, preventing interference and allowing precise control.
Why is pairing my drone with the remote controller an important first step?
Establishing a reliable connection through pairing is crucial for flight safety and operational control. Without proper binding, the drone would not respond to any input from the controller, making flight impossible.
What are the general steps to pair a drone with its remote for the first time?
You typically start by powering up the remote controller, then the drone. Next, you initiate a binding sequence on the remote (often with specific button presses or joystick movements) and wait for a clear confirmation of connection from both devices.
What should I do if my drone and remote controller are not connecting?
First, try turning both devices off and on again. Also, ensure both the drone and remote have sufficient battery charge, are close to each other (within 1-3 feet), and are away from strong environmental interference like other Wi-Fi signals.
What is ‘calibration’ and why is it important after pairing?
After pairing, calibration often involves specific joystick movements that help the drone’s internal sensors, like its compass and gyroscope, ensure stable and accurate flight. An uncalibrated drone can drift or behave erratically.