The quest to build a **tiny Arduino FPV drone** presents unique challenges. This project, while rewarding, often demands meticulous attention to detail. Below, we’ll expand on the video’s insights, offering a deeper dive into the technicalities. We will guide you through the intricate process of assembling a miniature FPV quadcopter. This guide is crafted for the seasoned DIY enthusiast.
The Genesis of a Tiny Arduino FPV Drone
Embarking on a **DIY Arduino drone** project offers an unparalleled learning curve. This endeavor combines electronics, aerodynamics, and programming. The video above provides an excellent visual walkthrough. Here, we delve into the technical underpinnings. We address common pitfalls and advanced optimizations. Our goal is to ensure your miniature camera drone takes flight.
Essential Components for Your Micro Quadcopter
Component selection is critical for a lightweight FPV drone. Each part must balance performance with minimal mass. Brushed coreless motors are chosen for their high power-to-weight ratio. They are ideal for small airframes. A 3-gram FPV camera is specified. This low weight preserves flight time and agility. These parts form the backbone of your **tiny Arduino FPV drone**.
- Brushed Coreless Motors with Propellers: Essential for thrust.
- Custom Motor Driver Board Components: MOSFETs, Schottky diodes.
- Flight Controller Modules: Arduino Pro Mini (3.3V), MPU6050 gyro.
- Receiver Module: NRF24 radio transceiver.
- FPV Camera: 3-gram, 600 TVL resolution camera with integrated VTX.
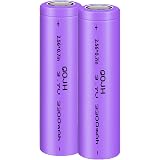
- LiPo Battery: 250 milliamp hour capacity.
- Frame Materials: Popsicle sticks or PLA filament for 3D printing.
- Miscellaneous: Connectors, wires, super glue, Kapton tape, copper sheet.
Crafting the Airframe: Wood vs. 3D Print
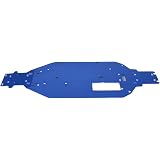
The airframe choice impacts durability and ease of assembly. A popsicle stick frame is DIY-friendly and budget-conscious. It requires precise cutting and sanding. Sanding each piece to credit card thickness significantly reduces weight. Only the motor arms retain original thickness for structural integrity. This meticulous approach is vital for a light wind flyer.
Conversely, a 3D printed frame offers precision and speed. It can incorporate complex geometries. PLA filament is a common choice. Both methods aim for a lightweight yet robust structure. Integrating rubber bumper guards enhances crash protection. A thin coat of super glue strengthens vulnerable areas. Frame design is paramount for the overall performance of your **miniature camera drone**.
Advanced Electronics: Motor Driver and Flight Controller
The electronic heart of your drone demands precision. Building a custom motor driver board from SMD components is challenging. It requires fine soldering skills. Field effect transistors (MOSFETs) switch motor power. Schottky flyback diodes protect these transistors. They prevent damaging voltage spikes during motor operation. Always wear an electrostatic discharge (ESD) wrist strap. This protects sensitive components from static electricity.
The flight controller stack utilizes an Arduino Pro Mini. It is paired with an MPU6050 gyro accelerometer sensor. The MPU6050 provides vital orientation data. This data is critical for stable flight. Powering the Arduino and MPU6050 directly from the 3.3-volt LiPo cell ensures consistent power. Removing pin headers and directly soldering wires reduces overall weight. This detail is crucial for micro-class drones. Kapton tape insulates exposed connections. Hot glue provides mechanical support and prevents short circuits.
Radio Control: Transmitter and Transceiver Integration
An NRF24 radio transceiver handles drone communication. It is a compact 2.4 GHz module. It facilitates robust wireless control. Soldering direct wires minimizes weight. Gluing the module securely prevents dislodgement. The custom Arduino transmitter, adapted from an Emilo design, allows full control. It includes toggle switches and a voltage divider. This monitors battery levels. Proper pin definitions are essential for seamless operation. Joystick value reversal often requires simple code adjustments.
The FTDI or USB to serial converter is necessary for programming. A custom bridging connector ensures compatibility with the Arduino Pro Mini. Uploading firmware requires specific Arduino IDE settings. The MultiWii configurator software visualizes drone orientation. It verifies joystick input. It also allows selection of switch channels for arming and other modes. Arming the drone unlocks motor control. A beeper alarm aids in drone recovery. These steps are crucial for the functionality of your **Arduino FPV drone**.
Troubleshooting the Tiny Arduino FPV Drone: A Deep Dive
The journey to a successful flight is often fraught with troubleshooting. The video highlighted several key issues. These are common in micro-drone builds. Understanding these problems and their solutions is invaluable. Our **DIY drone** project serves as an excellent case study.
Addressing Motor Thrust Deficiencies
Initial flight tests revealed insufficient thrust. The original DF Robot motors produced only 6 grams of thrust each. This totaled 24 grams. The drone weighed 30 grams. A thrust-to-weight ratio of at least 2:1 is generally recommended for stable flight. This ratio was clearly inadequate. Replacing them with motors producing 14 grams of thrust each was transformative. This increased total thrust to 56 grams. This represented a 133% increase in individual motor thrust. This significant boost allowed the drone to achieve lift. Proper motor selection is non-negotiable for **FPV drone build** success.
Mitigating Electrical Noise and Arduino Resets
Electrical noise is a pervasive issue in compact electronic systems. It often causes erratic behavior. The Arduino resetting during throttle-up indicated severe power fluctuations. Adding filtering capacitors at the Arduino and radio module power inputs helped. However, the issue persisted. Motors generate substantial electromagnetic interference (EMF). This noise can corrupt sensor readings. It can also interfere with microcontroller operations. The Arduino’s PWM frequency output to motors was initially 500 hertz. This was too low. It caused excessive electrical noise. Raising it to 2 kilohertz improved responsiveness. Yet, the resets continued.
A forum thread suggested current limiting resistors. They were placed between output pins and transistor gates. This did not solve the problem. The ultimate solution involved physical isolation and shielding. Raising the gyro sensor farther from the motor driver reduced electrical noise pickup. This simple physical adjustment proved crucial. Furthermore, integrating an EMF blocking shield was highly effective. A copper sheet, grounded to the Arduino, significantly reduced EMF effects. This metal acts as a Faraday cage. It protects sensitive hardware from electromagnetic interference. This comprehensive approach finally stabilized the **Arduino drone**.
Correcting Wobble and Enhancing Stability
Post-reset issues, the drone exhibited aggressive side-to-side wobble. This indicated an “out of tune” system. PID (Proportional-Integral-Derivative) control parameters were likely miscalibrated. The EMF blocking shield improved sensor accuracy. This laid the groundwork for better stability. Temporary hot glue stick landing gear ensured a perfectly flat takeoff surface. This initially mitigated the wobble. For robust stability, however, PID tuning is essential. This fine-tunes the flight controller’s response to errors. It makes the drone highly flyable.
Optimizing Flight Performance: PID Tuning and FPV Integration
Achieving stable and responsive flight requires careful calibration. The MultiWii configurator provides tools for this. Basic PID tuning focuses on smoothing oscillations. The ‘P’ (Proportional) gain in PID controllers is adjusted. Lowering roll and pitch ‘P’ values gradually eliminates high-frequency oscillations. This makes the drone much more stable. ‘Rate’ and ‘Expo’ values fine-tune control sensitivity. Lowering ‘Rate’ reduces overall responsiveness. Raising ‘Expo’ creates a smoother control curve around the stick center. This allows for precise, subtle movements while retaining full throws for aggressive maneuvers.
The FPV camera is central to the experience. A 3-gram, 600 TVL resolution camera with a built-in transmitter is efficient. It draws power directly from the LiPo battery. Paired with 5.8-gigahertz FPV goggles, it delivers a live feed. This setup offers an immersive first-person view. It is perfect for indoor or light outdoor racing. Propellers are crucial for propulsion. Four-bladed propellers, 31 millimeters in diameter, are selected. Correct orientation ensures downward thrust. Propeller direction must match motor rotation. This attention to detail ensures optimal performance for your **tiny Arduino FPV drone**.
A 250 milliamp hour LiPo cell powers the drone. Its placement affects balance. Sliding the battery adjusts the center of gravity. This corrects any flight veering. The drone weighs 30 grams fully assembled. This classifies it as a “light wind flyer.” This small size allows indoor flight. It is also suitable for calm outdoor conditions. Always power on the drone flat. Calibrate the gyro with joystick movements. Then arm the drone. These steps ensure a safe and successful flight with your custom **DIY Arduino drone**.
Tiny Drone, Big Questions: Your Q&A
What is a tiny Arduino FPV drone?
It’s a small drone you can build yourself using an Arduino microcontroller. It includes an FPV (First Person View) camera that sends live video back to you, allowing you to fly it as if you were on board.
What are some main parts needed to build this drone?
You’ll need brushed coreless motors, an Arduino Pro Mini for the flight controller, an NRF24 radio receiver, a lightweight FPV camera, and a small LiPo battery.
What materials can be used to make the drone’s frame?
The drone’s frame can be crafted from popsicle sticks, which is budget-friendly, or 3D printed using materials like PLA filament for more precision.
Why is it important to choose the right motors for this drone?
Proper motor selection is crucial because the motors need to provide enough thrust to lift the drone and allow for stable flight. A thrust-to-weight ratio of at least 2:1 is generally recommended.
What is the FPV camera for?
The FPV camera on the drone provides a live video feed, often to FPV goggles, giving the pilot an immersive first-person view. This is great for indoor flying or light outdoor racing.