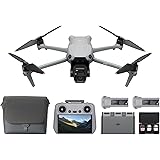
The allure of flight has captivated humanity for centuries. Today, that fascination often takes the form of drones, soaring devices capable of everything from breathtaking aerial photography to high-speed racing. While many opt for off-the-shelf models, a growing number of enthusiasts are discovering the immense satisfaction of building their own. This hands-on journey offers a deeper understanding of drone technology and often leads to a more customized, personal flying experience.
If you’ve ever dreamt of constructing your own aerial marvel, the video above provides a fantastic visual guide to creating a tricopter from scratch. A tricopter is an excellent choice for DIY enthusiasts, offering a unique blend of stability and agility, distinct from its four-rotor cousin, the quadcopter. This guide delves into the essential knowledge you’ll need to transform components into a functioning flying machine, complementing the visual steps shown in the video with detailed explanations and practical advice.
Understanding Your Tricopter: More Than Just Components
Before you begin assembling, it’s vital to grasp the function of each part. Think of building a tricopter like assembling a sophisticated organism; each “organ” plays a crucial role in its overall performance. Unlike a pre-built drone, where the magic happens behind a sleek casing, building one reveals the intricate dance between electronics and mechanics.
Where a quadcopter relies on four fixed motors, a tricopter uses three. Its unique agility comes from a mechanical tail mechanism that allows the rear motor to pivot, controlling the yaw axis. This design choice often results in a more graceful, almost helicopter-like flight characteristic that many pilots prefer. However, it also introduces an additional layer of mechanical complexity compared to a standard quadcopter.
Essential Tricopter Components: Your Shopping List
Every successful build starts with the right ingredients. Gathering these drone components is your first mission. While the video might show the parts, understanding what to look for ensures you pick suitable items for your specific build. Prioritizing quality here saves a lot of headaches later on.
- Frame: This is the skeleton of your drone. Materials like carbon fiber or G10 fiberglass offer strength and lightness. Consider the size based on your desired propeller diameter and portability needs.
- Motors: Three brushless motors, typically chosen for their KV rating (RPM per volt). The KV rating dictates how fast the motor spins, directly impacting your tricopter’s power and efficiency. Match these to your propeller size and battery voltage.
- Electronic Speed Controllers (ESCs): These are the muscles that power your motors. Three ESCs are needed, one for each motor. They translate signals from the flight controller into appropriate power levels for the motors. Ensure their amperage rating exceeds your motor’s maximum current draw.
- Flight Controller (FC): This is the brain of your drone. Modern FCs often use open-source firmware like Betaflight, ArduPilot, or INAV, offering extensive customization. It interprets your radio commands and stabilizes the aircraft.
- Propellers: Three propellers, matched to your motor’s KV and battery voltage. Remember that the rear propeller on a often needs a different rotation direction compared to the front two, depending on the motor orientation.
- Battery: A Lithium Polymer (LiPo) battery provides the power. Its voltage (e.g., 3S, 4S) and capacity (mAh) will dictate flight time and power delivery. Always use a battery that safely powers your chosen motors and ESCs.
- Radio Transmitter and Receiver (Tx/Rx): This is how you communicate with your . A multi-channel radio system is essential for control.
- Power Distribution Board (PDB) or 4-in-1 ESC: Manages power distribution to your ESCs and flight controller. A PDB simplifies wiring, while a 4-in-1 ESC integrates the ESCs and often a PDB into one unit.
- Tail Servo and Mechanism: Crucial for the yaw control. The servo physically pivots the rear motor, providing directional stability. This is a key differentiator from a quadcopter build.
Your Builder’s Arsenal: Gathering the Right Tools
Just as a chef needs their knives, a builder requires a specific set of tools. Having the right equipment makes the assembly process smoother and safer. Attempting to force parts or use incorrect tools can lead to damage or frustration, often making a simple task much harder than it needs to be. Invest in quality tools; they are an extension of your skill.
- Soldering Iron and Solder: Absolutely essential for connecting electrical components. A good quality iron with temperature control is paramount.
- Wire Strippers and Cutters: For preparing wires for soldering and managing cable lengths.
- Hex Drivers/Screwdrivers: To assemble the frame and mount components.
- Heat Shrink Tubing: For insulating soldered connections, preventing short circuits.
- Multimeter: Invaluable for checking continuity and voltage, helping diagnose wiring issues.
- Zip Ties and Double-Sided Tape: For securing components and managing cables.
- Safety Glasses: Always protect your eyes, especially when soldering or cutting.
- Bench Power Supply (Optional but recommended): For safely testing components at lower voltages before full power-up.
The Assembly Journey: Bringing Your Tricopter to Life
With your components and tools ready, it’s time to begin the physical construction. Follow the visual cues in the video closely, as seeing the assembly process can be incredibly helpful. Remember, patience is your most valuable tool during this phase. Don’t rush any steps, especially when it comes to electrical connections.
Frame Assembly: Building the Foundation
The frame is the backbone of your drone. Begin by carefully assembling the main frame plates and arms according to the manufacturer’s instructions. Ensure all screws are tightened appropriately, but avoid overtightening, which can strip threads or crack carbon fiber. This initial stability ensures all subsequent components have a solid base.
Motor Mounting and ESCs: Powering Your Flight
Mount the brushless motors securely onto the ends of the arms. Pay attention to the orientation for the two front motors and the single rear motor, as propeller rotation direction will depend on this. Next, mount your ESCs, typically near their respective motors, and solder the motor wires to the ESCs. Remember to insulate all connections with heat shrink tubing to prevent any accidental shorts. Proper wiring here is like ensuring your car’s engine gets fuel; without it, nothing moves.
Propeller Installation: The Wings of Your Tricopter
While the video might show propeller installation, it’s crucial to leave this step until the very end, especially before initial testing. Propellers can be incredibly dangerous. Ensure you install them with the correct rotation direction for each motor. The two front motors will typically spin in opposite directions, while the rear motor’s direction is determined by your flight controller’s configuration. This careful installation prevents unintended lifts or sudden directional changes.
Wiring the Brains: Flight Controller & Power
This is arguably the most critical and complex wiring stage. Connect your ESCs to the flight controller’s motor outputs. Next, wire the power distribution board (PDB) or integrated ESC to your battery connector, ensuring correct polarity (positive to positive, negative to negative). Then, power your flight controller from the PDB or integrated ESC. Connect your radio receiver to the flight controller. This network of wires is the central nervous system, carrying power and signals throughout your drone.
Tail Mechanism Integration: The Tricopter’s Unique Feature
Unlike quadcopters, a requires a tail servo mechanism. Install the servo and its linkage to the rear motor mount, allowing the motor to pivot. Connect the servo to the appropriate servo output on your flight controller. This mechanism is key to the yaw control, granting it a distinct maneuverability compared to its multi-rotor cousins. It’s like adding a rudder to a boat, offering precise directional steering.
The Brains of the Operation: Flight Controller Setup and Calibration
Hardware assembly is only half the battle. The flight controller’s software is the intelligence that brings your to life. This step, while not purely visual, is indispensable. Without proper configuration, your meticulously built is just a collection of parts.
Connecting to Your Flight Controller Software
First, connect your flight controller to your computer via a USB cable. Open the appropriate configurator software (e.g., Betaflight Configurator, Mission Planner). If you’re using Betaflight, ensure you have the correct drivers installed. The software interface will be your window into the brain, allowing you to fine-tune its behavior.
Flashing Firmware and Initial Setup
It’s often a good practice to flash the latest stable firmware to your flight controller. This ensures you have the most up-to-date features and bug fixes. After flashing, go through the initial setup wizard. This usually involves: selecting your frame type, calibrating the accelerometer, setting up your receiver’s communication protocol (e.g., SBUS, PPM, CRSF), and configuring your ESC protocols (e.g., DShot, OneShot). Each setting is like a different language your needs to understand to communicate effectively.
Motor and ESC Calibration
This step ensures your motors spin up correctly and at the right speeds. Follow the specific calibration procedure for your chosen ESCs and flight controller firmware. Often, this involves connecting the battery, holding down a button on the ESC, and moving the throttle stick on your transmitter. Proper calibration is crucial for smooth and predictable flight, ensuring all motors respond uniformly to commands. An uncalibrated ESC is like an orchestra where instruments play at different tempos.
PID Tuning and Flight Modes
PID (Proportional, Integral, Derivative) values are the heart of your flight performance. These values determine how aggressively or smoothly the corrects itself in the air. While default PID settings can often get you airborne, fine-tuning them improves stability and responsiveness. Additionally, set up various flight modes (e.g., Angle Mode for self-leveling, Acro Mode for full manual control) and assign them to switches on your radio transmitter. This customization offers flexibility during flight.
First Flight and Beyond: Taking to the Skies
The moment of truth arrives when your is ready for its maiden flight. Before you even think about lifting off, prioritize safety above all else. A homemade is a powerful machine, and respecting its capabilities is paramount. Always perform pre-flight checks and choose an appropriate environment for your initial tests.
Pre-Flight Safety Checks
- Remove Propellers: For initial motor testing and calibration, *always* remove your propellers.
- Double-Check All Connections: Ensure every wire is secure and insulated.
- Battery Voltage: Verify your battery is fully charged and securely mounted.
- Radio Link: Confirm your transmitter is bound to your receiver and all controls respond correctly in the flight controller software.
- Motor Direction: With propellers off, carefully test each motor individually to ensure it spins in the correct direction as configured in your FC.
- Tail Servo Function: Check that the tail servo moves smoothly and responds to yaw commands from your transmitter.
The Maiden Flight: Gentle Introduction
Choose an open, clear area away from people, animals, and obstacles. Arm your (after installing propellers carefully). Slowly increase the throttle. The goal of the first flight isn’t acrobatics, but to gently lift off, hover stably for a few seconds, and land smoothly. Observe how it behaves. Does it drift? Is it stable? Initial flights are like learning to walk; you take small, controlled steps.
Advanced Flying and Customization
Once you’re comfortable with basic flight, you can begin to explore advanced settings. Experiment with different PID tunes, adjust rates and expo for a more responsive feel, and even delve into adding features like GPS, FPV (First Person View) cameras, or LED lighting. The beauty of a you build yourself is the endless potential for customization and learning. It’s an ongoing project, not just a one-time build.
Troubleshooting Common Tricopter Issues
Building a is a rewarding process, but it’s rarely without its challenges. Even experienced builders encounter snags. Knowing common issues and their solutions can save you hours of frustration. Think of these as common ailments for which you already have the remedies.
- Not Arming: This often points to a safety feature. Check if your throttle is at the lowest position, your radio is connected, battery voltage is sufficient, or if any pre-arm checks (like accelerometer calibration) have failed. Flight controller software will usually provide a reason why it’s not arming.
- Unstable Flight/Drifting: Recalibrate your accelerometer and gyroscope. Check for loose frame components or unbalanced propellers. Incorrect PID tuning is also a common cause; try reducing P-gain values as a starting point.
- Motor Not Spinning or Stuttering: Inspect motor and ESC connections for loose wires or poor soldering. Check the motor for physical damage. Ensure ESCs are properly calibrated and the ESC protocol matches your flight controller settings.
- Yaw Drifting or Poor Yaw Control: This is particularly critical for a . Check your tail servo for proper function, ensure its linkages are free, and that the rear motor pivots smoothly. Your flight controller’s yaw PID tuning may also need adjustment.
- Loss of Radio Link: Check antenna connections on both your receiver and transmitter. Ensure they are not obstructed or damaged. Interference from other electronics can also be a culprit.
Building a is more than just assembly; it’s an educational journey into electronics, mechanics, and aerial dynamics. By combining the visual guidance of the video with these detailed instructions, you gain a comprehensive understanding of each step. This hands-on experience, from soldering to software configuration, truly grounds you in the world of DIY , allowing you to confidently build a that soars through the skies.
From Parts to Propellers: Your Tricopter Q&A
What is a tricopter?
A tricopter is a type of drone that uses three motors for flight, unlike a quadcopter which uses four. Its design allows the rear motor to pivot, giving it a unique blend of stability and agility.
Why would someone choose to build their own tricopter?
Building your own tricopter offers a deeper understanding of drone technology and leads to a more customized, personal flying experience. It also provides immense satisfaction for hobbyists.
What are some essential parts needed to build a tricopter?
You’ll need a frame, three brushless motors, three Electronic Speed Controllers (ESCs), a flight controller (FC), propellers, and a battery. These form the core functional parts of the drone.
What is the ‘brain’ of the tricopter?
The flight controller (FC) is the ‘brain’ of your tricopter. It interprets your commands from the radio and stabilizes the aircraft, ensuring it can fly properly.
What is the most crucial tool for making electrical connections when building a tricopter?
A soldering iron and solder are absolutely essential for connecting the electrical components. Having a good quality iron with temperature control will make the process smoother and safer.